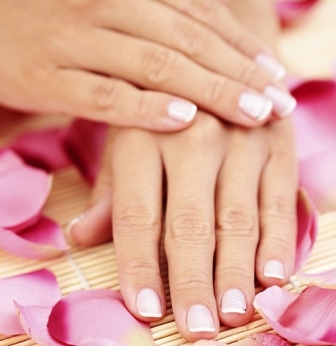
Nail art has taken a huge form in recent years. You must have come across a lot of variations in nail art. A very known form of decorating nails alongside nail arts is the sporting of nail jewellery via nail piercing. Nail piercing has become quite common these days. You can try out nail piercing at your home’s comfort by following a few simple steps.

However remember that if your nails are brittle or not long enough, you should avoid nail piercing. Brittle nails are not good candidates for nail piercing. It will only make your nails weaker. Also you must always avoid wearing too heavy jewellery on the nails because it will put a lot of pressure at the roots of the nails and make them prone to chipping or sudden breakage. After a party or night out , do not forget to remove the nail jewellery. You may accidentally rip off a certain portion of your nails if your nail jewellery gets stuck to your clothing. So always be careful when wearing nail jewellery.
Nail Piercing at Home Step by Step Process:
Let us now see how easily you can do a professional nail piercing with 9 simple steps:
Things Needed:
1. Nail drill – this is a hand held drill that we are talking about here. There are electric or battery operated drills also but for a normal nail piercing you will not require those.
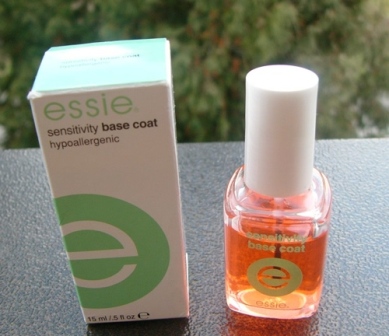
2. Base coat / nail strengthener
3. Nail polish
4. Top coat
5. Nail buffer
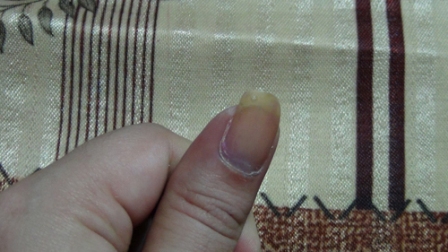
Step 1: Start on clean, paint free and buffed nail surface. Make sure your nails do not have any base coat or any sort of coating of colour on them. This should be done preferably after a proper manicure.
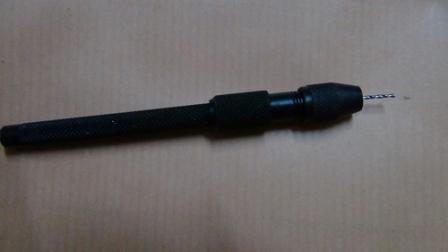
Step 2: A special equipment called nail driller is available on nail art stores which is used by professionals to pierce nails. You can buy this equipment online too. Of Course even if you are not a professional, you can still follow our post and do a nail piercing right at your home with a nail driller.
Step 3: While doing a nail piercing make sure not to apply too much pressure. You may puncture your finger’s skin. Be careful with a driller. It is a wrong concept that you need to apply too much pressure.
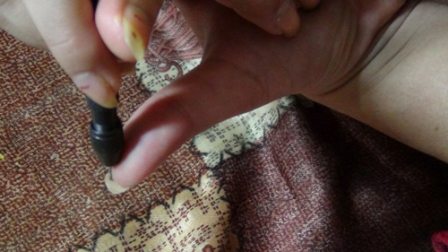
Step 4: Start to rotate the driller in left and right direction slowly by putting a bit of pressure on the nail from the opposite side. Always do nail piercing from the inner or opposite side of nails.
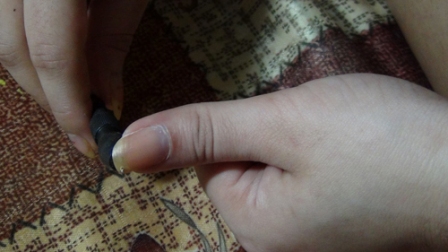
Step 5: Keep rotating the drill on both sides till you create a hole in your nails. Make sure the drill goes fully inside and out of it.
Step 6:
Take a buffer and buff the sides of the nail. Buff around the hole so created.
Step 7:
Put a base coat or a nail strengthener. This will prevent the nail and the piercing so created from wearing away or getting chipped.
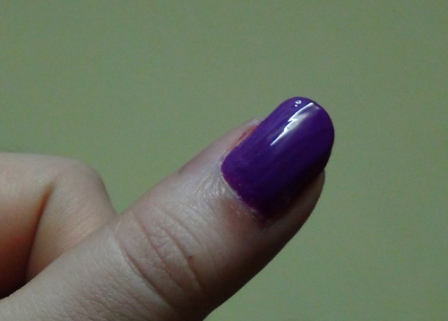
Step 8: Put your favorite nail polish or create the nail art that you have planned.Use a top coat to seal the nail art or nail polish for shine and protection.
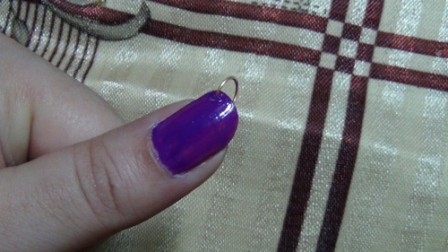
Step 9: Finally take a piece of nail art jewellery and put it through the hole created. Press the ring of the nail art jewellery to tighten it .
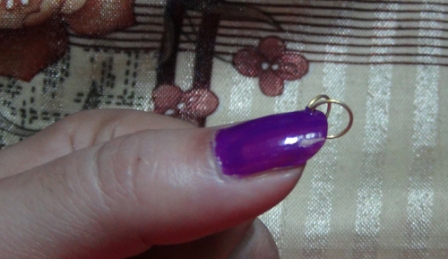
You can apply more than one nail ring in the hole like i have done. This will obviously depend on how big your pierced hole is. Try not to make the nail too heavy with nail jewellery.
Now you can sport your nail jewellery easily with the above mentioned steps. Hope you liked our article and will try out nail piercing. Leave some comments below.
See More: Simple and Easy Nail Art Designs


