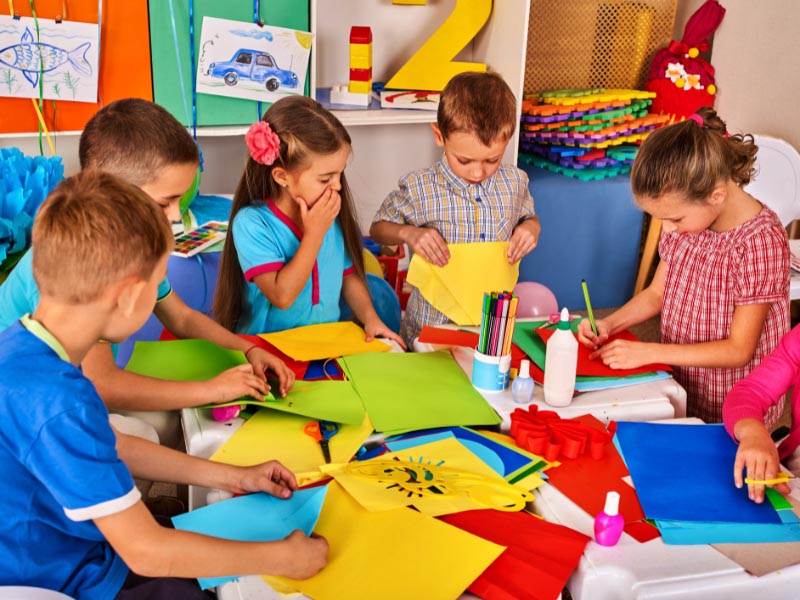
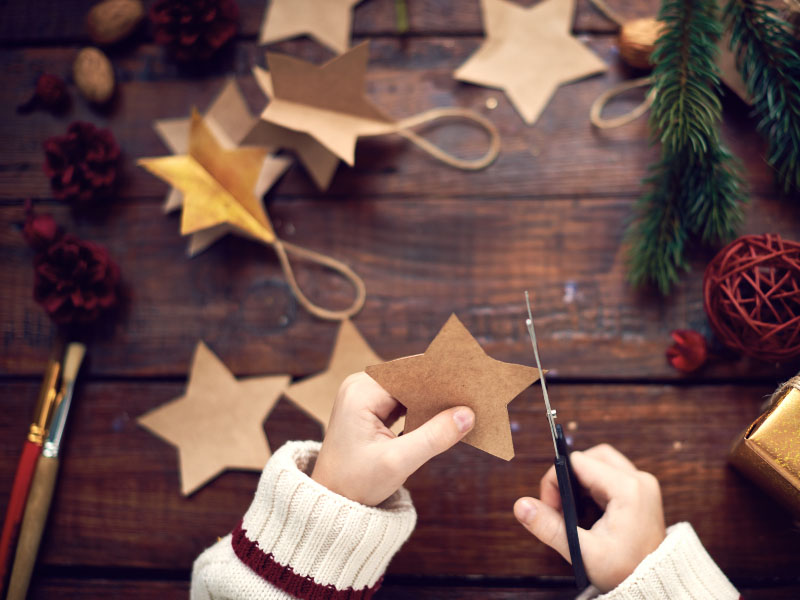
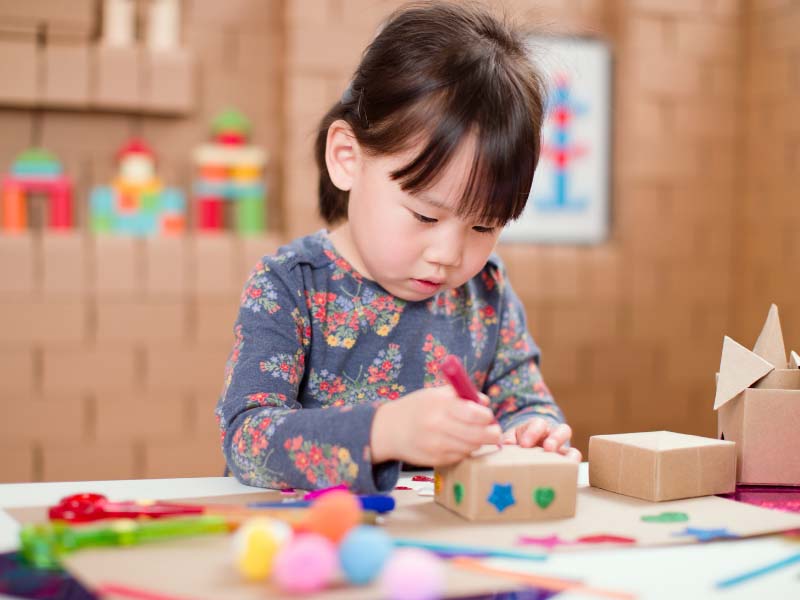
Paper crafting is not something meant only for kids, but it is an art that can be enjoyed by all. Paper craft-making helps to improve motor skills and relaxation and is a stress buster. Scroll down to discover magical ways of turning paper into something amazing that boosts your self-esteem and self-expression of your creativity!

25 Easy and Simple Paper Crafts:
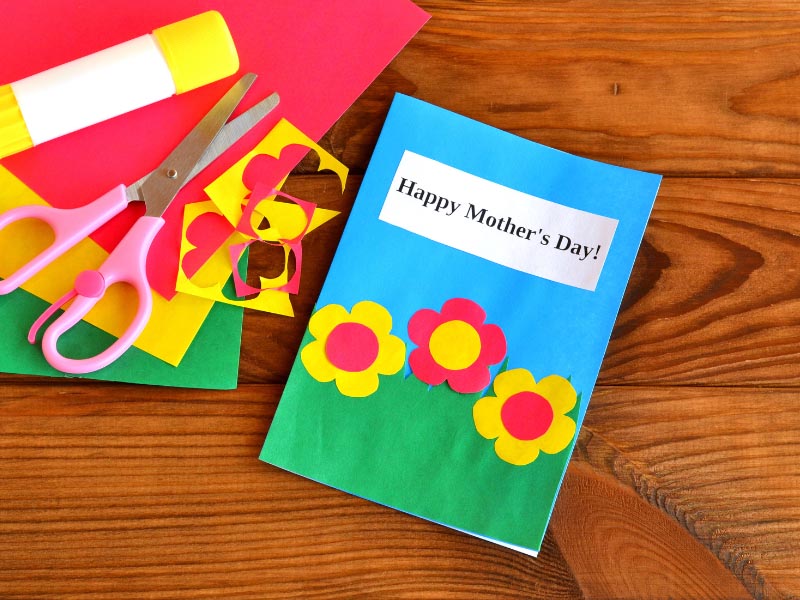
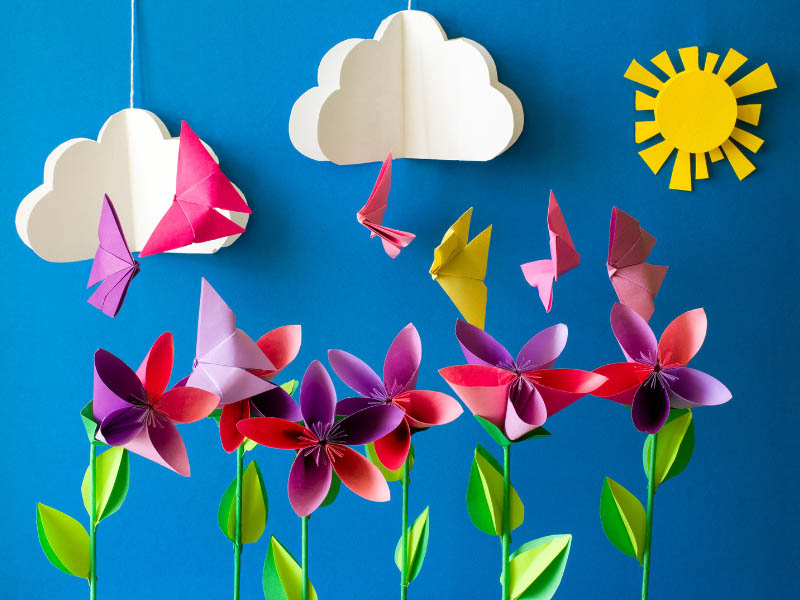
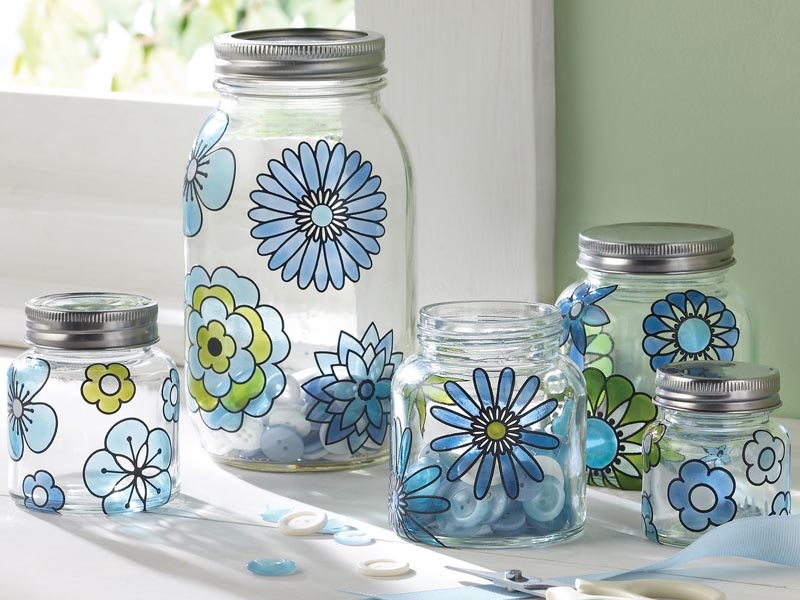
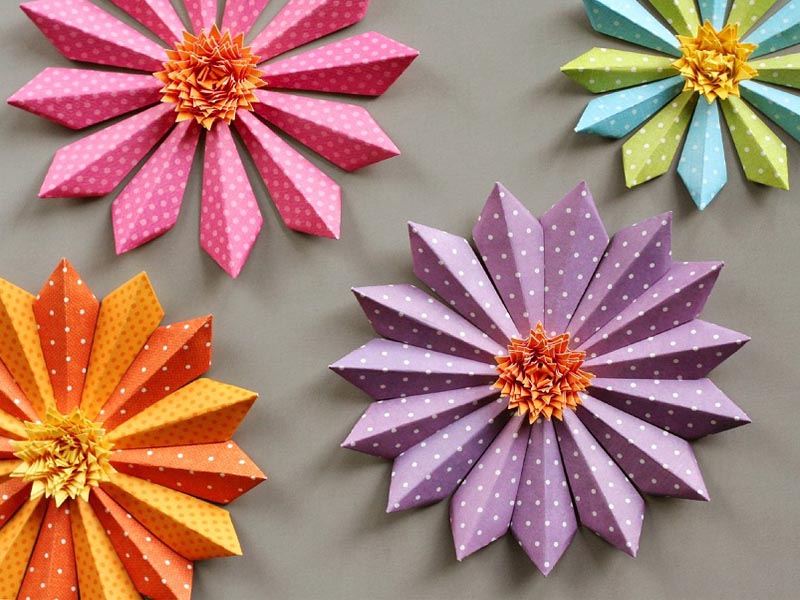
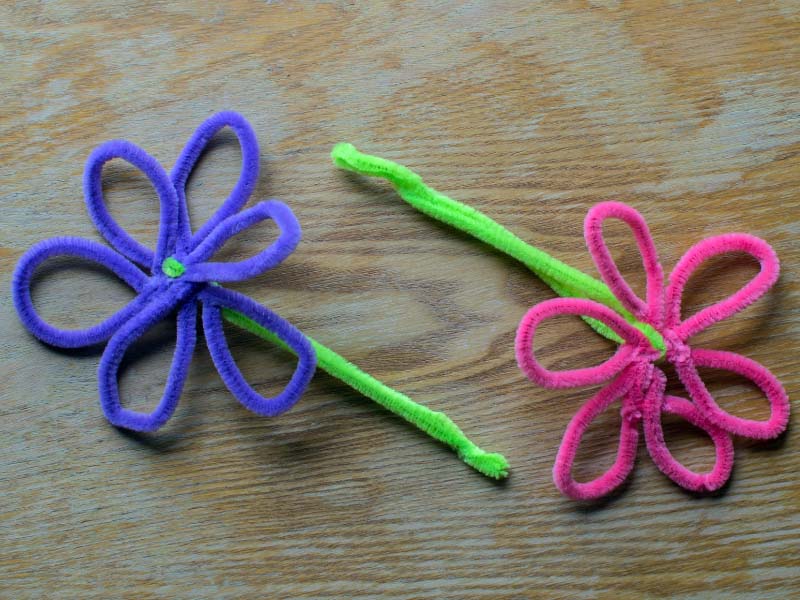
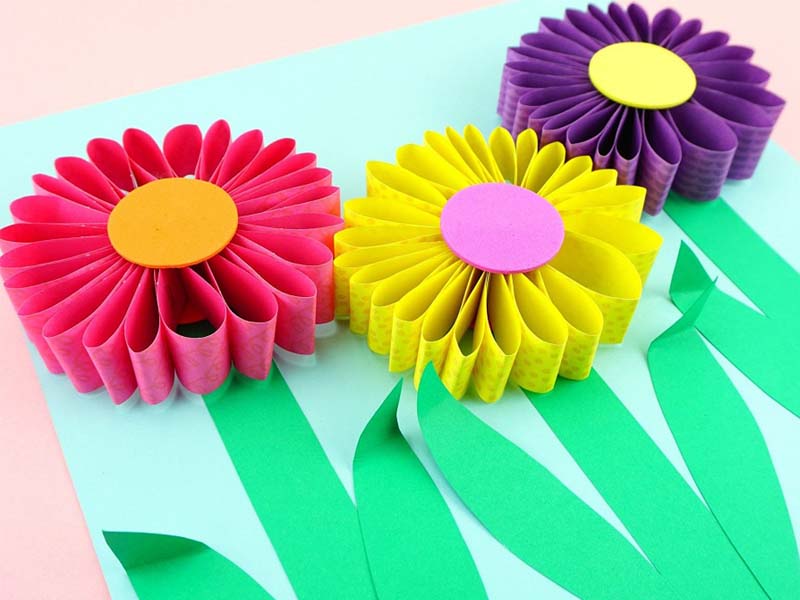
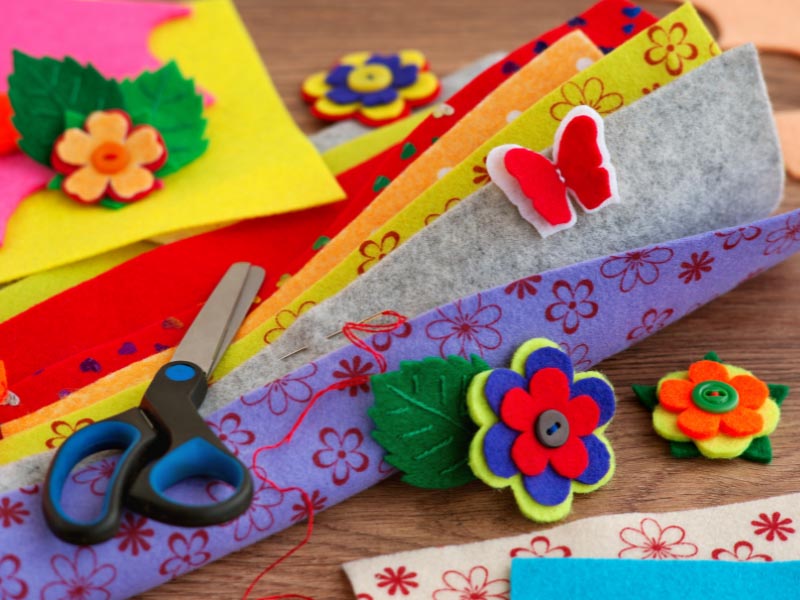
1. Paper Flower Craft:
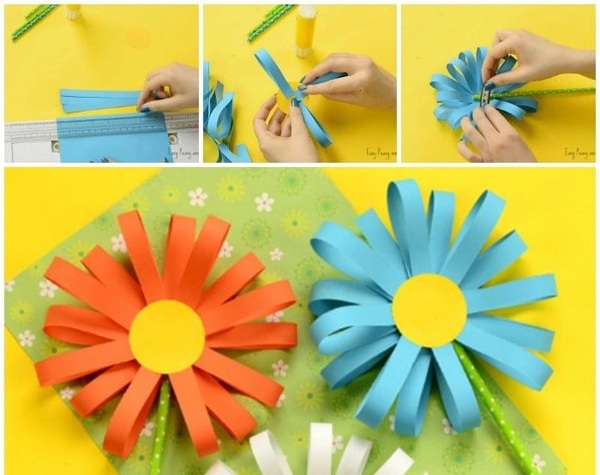
Flower DIYs are a perfect and pretty craft for children, and you do not have to feel guilty about cutting fresh flowers often!
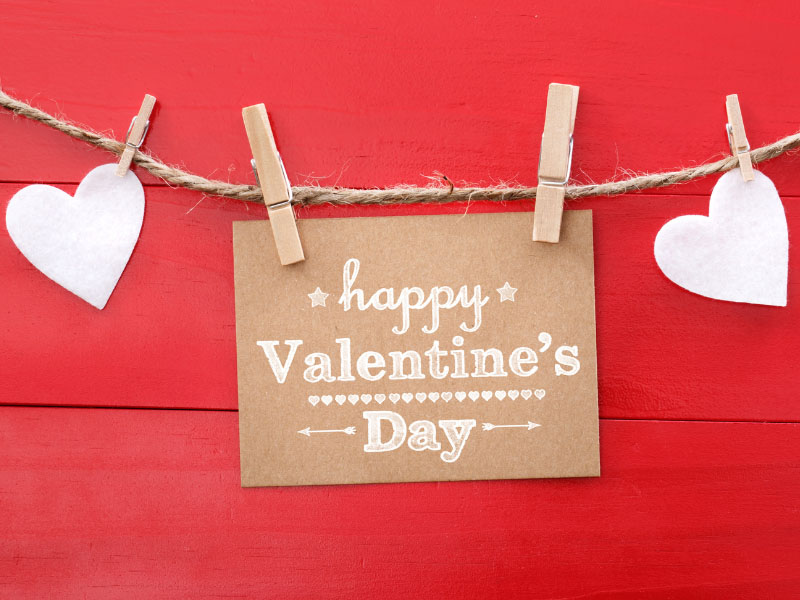
Speciality: This is an ideal easy papercraft art that brings color and joy into our world and is the perfect option for gifts for Mother’s Day and Valentine’s Day.
Material:
- Color paper
- Scale
- Scissors
- Glue
- Straws
- Cello tape
How to Do:
- Cut long and equal-sized strips of paper
- Cut a round-shaped circle to form the center of the flower
- Make a loop and stick them with glue
- Now arrange the loops to form a flower
- Stick the flower to the straw with cello tape.
2. DIY Paper Craft:
This is an easy cool paper craft that gives us beautiful hanging plants that are perfect for your kid’s room, especially if they are a science buff. It can be made quickly in different colors and sizes by children too.
Speciality: Enjoy this 3D paper planet hanging in your child’s room, depicting our solar system’s various planets!
Material:
- Thick colored paper
- Scissors
- Pencil
- Anything round to draw circles
- String
- Glue
How to Do:
- Place a round object and trace circles on colored paper
- Cut out the circles and fold the circle into half.
- Make a slit in the middle, as shown in the picture.
- Do the same with all the other circles.
- Take an uncut circle and slide in the slit circles.
- Repeat this for all the slit circles until you get the desired shape.
- Make a hole in the main circle and thread the string to hang it.
Read: Creative Arts And Crafts Ideas
3. 3D Paper Craft:
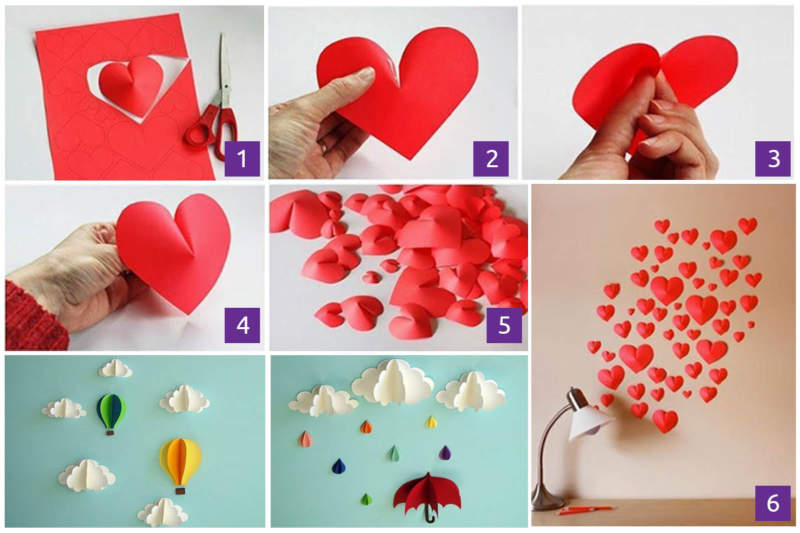
This is a cute paper craft that is fairly easy to make and is one of the easiest ways to beautify your home walls. Get ready to stick these 3D hearts to the wall and give a whole new look to the room.
Now cut these red-coloured hearts out. Next, cut out these hearts, and pinch them at the apex to cup the two heart bulbs, which gives it a 3D effect and secure the heart. Stick all the hearts on the wall, which gives you a beautiful heart craft on your room’s wall.
Speciality: This craft adds a much-needed pop of color to your room walls and has a 3D effect to it.
Material:
- Colored paper
- Scissors
How to Do:
- Draw hearts on a piece of colored paper and cut out these hearts
- Hold them pinched behind and secure them as shown in the image
- This gives you a beautiful 3D effect on the heart and sticks them on your walls.
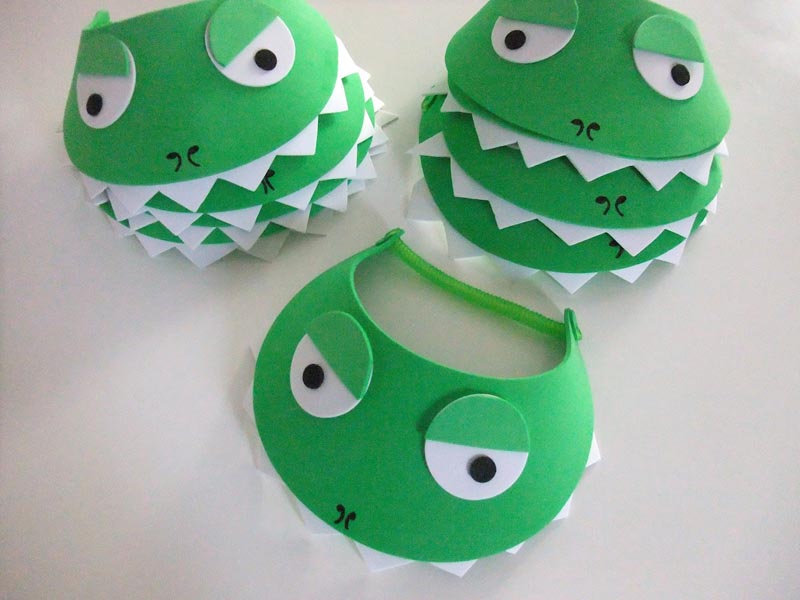
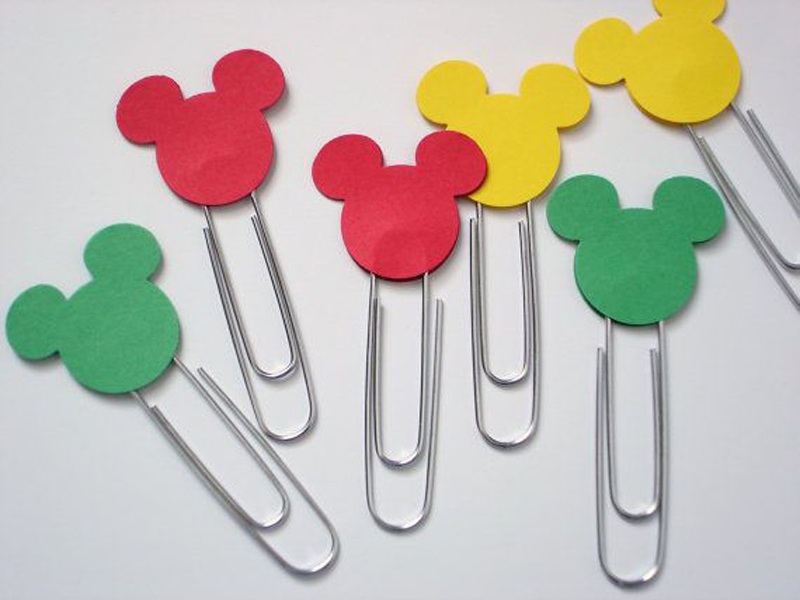
4. 5 Minute Paper Craft:
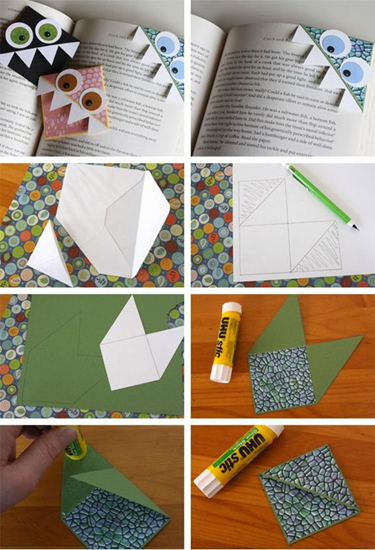
These are fun bookmarks that are fairly easy to make and are pretty to look at when made with bright colors. You can even decorate these bookmarks to make them look attractive and will be a ready favorite among kids.
Speciality: These cute monster bookmarks are very popular among children and can be easily made according to one’s imagination and make reading fun for children.
Material:
- Colored paper
- Pencil
- Googly eyes
- Glue
- Ribbon
- White paper for the teeth
How to Do:
- First, make a template by drawing three squares in an L-shape and folding it as shown in the picture.
- You can use the template on colored paper
- Fold the top triangular pieces inwards
- Use glue to stick the edges and make monster bookmarks unique by attaching a ribbon and decorating it with white paper with googly eyes and teeth
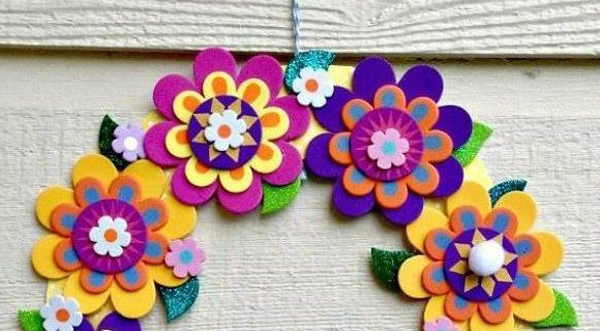
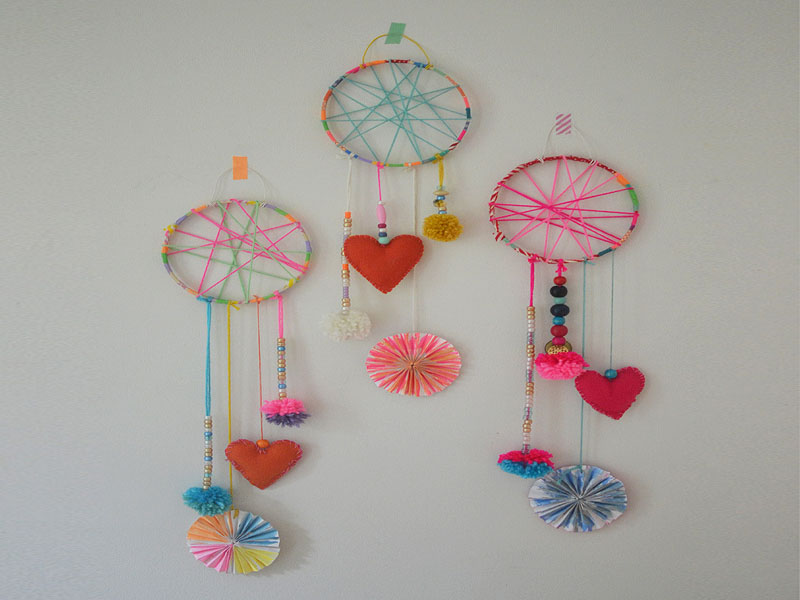
5. Paper Wall Hanging Craft:

Get ready to decorate your wall with this unique wall frame and add beauty to it. This creative paper craft makes a good giveaway gift that you can make easily using different colors.
Speciality: This is a simple way of using a waste product to create something beautiful!
Material:
- Chart paper
- Pencil
- Scissors
- Glue
- Glue gun
- Gold paint
How to Do:
- Draw big and small petals designs on a chart paper
- Cut out the petals and a circle that forms the center of the flower
- Draw some lines on the petals and roll them tightly on a pencil, which will make the petals curve and look natural
- Now apply glue on the petals and stick it to the round paper piece
- Make paper tubes with a newspaper
- Insert wire sealing both sides with a glue gun
- Bend the paper tubes to form natural stems
- Cut out a piece of cardboard of the required size to make a frame
- Stick duct tape on all sides to give it a smooth finish
- Paint all the petals in gold, red, and silver colors
- Stick stones in the center of each flower to make it look more attractive
- Glue the flowers to the stick and arrange the flowers inside the frame, sticking them with duct tape as shown in the picture.
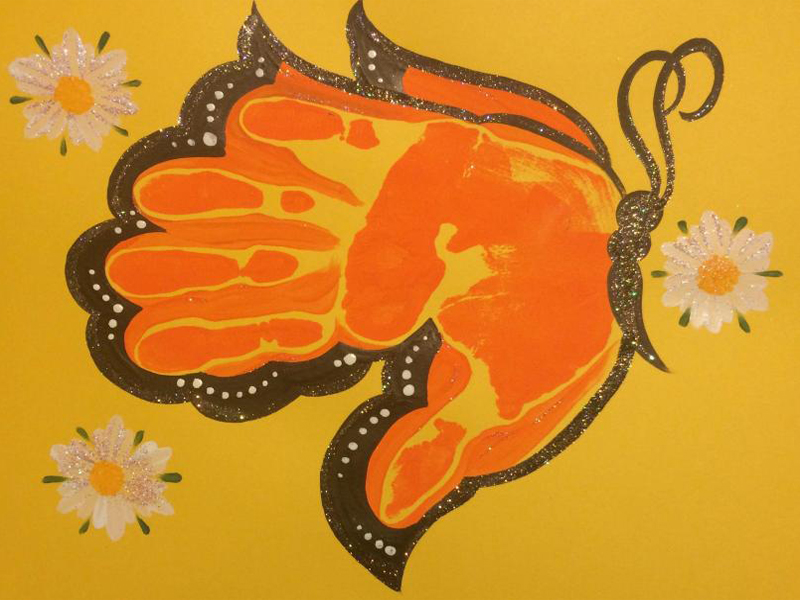
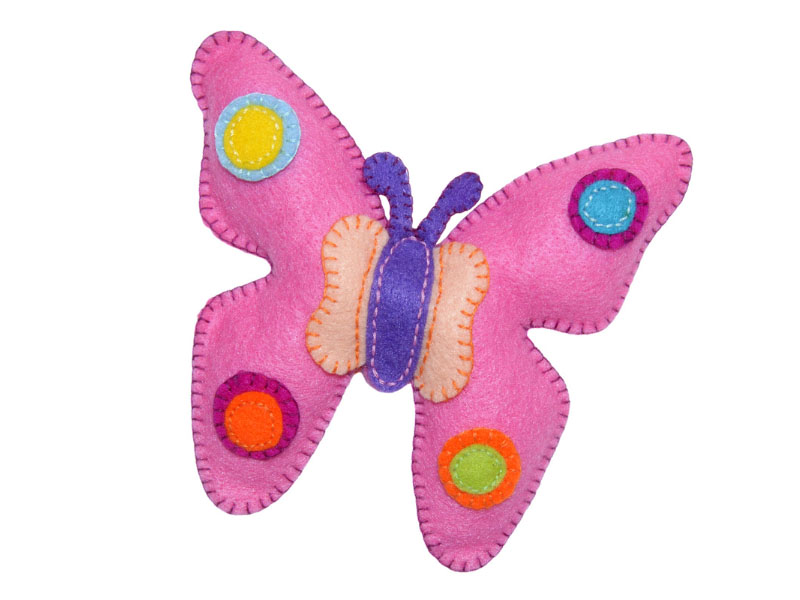
6. Butterfly Paper Craft:
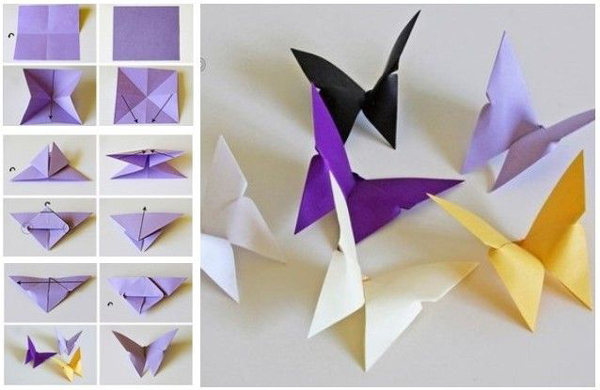
These are paper crafts for adults and children, and all that you need to transform the décor of your room are some of these beautiful origami butterflies craft with colorful wings.
Speciality: These beautiful butterflies of different sizes and colors can be created with these easy-to-follow steps.
Material:
- Bright-coloured sheets of paper
How to Do:
- Begin with a square sheet of colored paper.
- Fold the paper in both directions, pinch the corners inwards and follow the steps shown in the picture.
- Do not pull too hard while folding the paper.
- Finally, pull the lower triangle to the top and turn it over along the fold’s center. Staple the upper triangular flap to secure it in place.
- Your beautiful butterfly is ready!
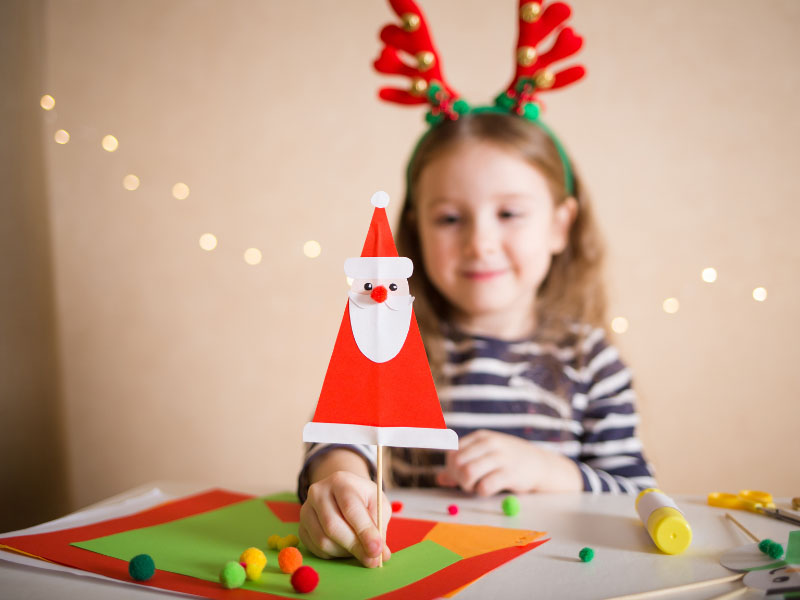
7. Paper Christmas Tree Craft:
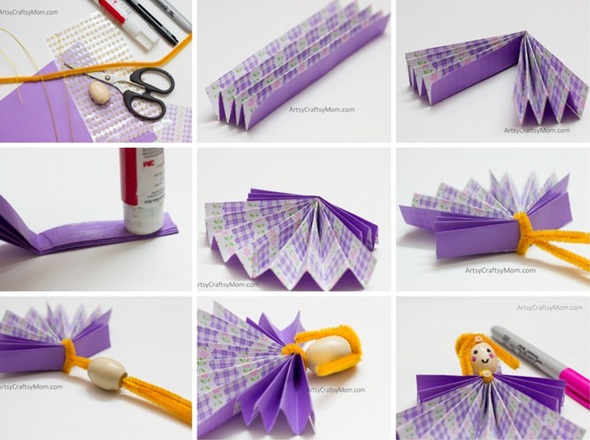
Decorating a Christmas tree is one tradition the children enjoy immensely, and what can be more special than seeing the ornaments made by them hanging on the tree?
Speciality: Among paper crafts for kids, this lovely angel Christmas ornament is simple to make with easy-to-follow instructions and is an instant favorite.
Material:
- Origami paper with patterns in two sizes
- Scissors
- Glue
- A large-sized wooden bead
- Pipe cleaner (orange)
- Gold sequins
- Gold wire
- Colored pens
How to Do:
- Use origami paper in different colors, and accordion fold the larger square ( 6×6 inch)and fold this in half
- Stick the edge of the folded paper using glue to create a fan-like shape
- Do this with the smaller square paper too
- Use contrasting colors to make the wings
- Stick the smaller paper fold on top of the larger one, as shown in the picture
- Insert the orange-colored pipe cleaner through the paper and twist it in place.
- Use the wooden bead as shown through the pipe cleaner
- Create the shape of hair using the excess pipe cleaner
- Now draw eyes, mouth, and pink cheeks and decorate with shiny gold sequins with gold wire in a halo.
- Hang the ornament with a golden metal wire onto the tree.
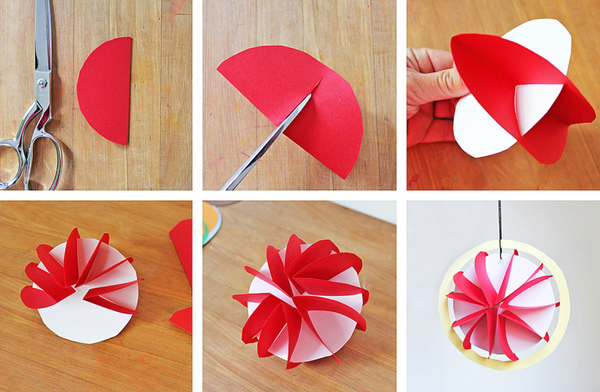
8. Quilling Paper Craft:

Quilling is a paper art project that is also known as a paper filigree. This is an art where strips of paper are rolled and glued to create beautiful art. You can make tight, loose coils, teardrop shapes, tulips, etc.
Speciality: This paper art skill is one that you can quickly master and make beautiful greeting cards.
Material:
- A toothpick
- Strips of paper
- Glue
How to Do:
- Tightly roll a strip of paper with a toothpick
- Pull the center of the rolled coil and glue them in place with a water-based glue
- Use a light touch when using glue with paper quilling to create charming designs.
9. Glitter Paper Craft:
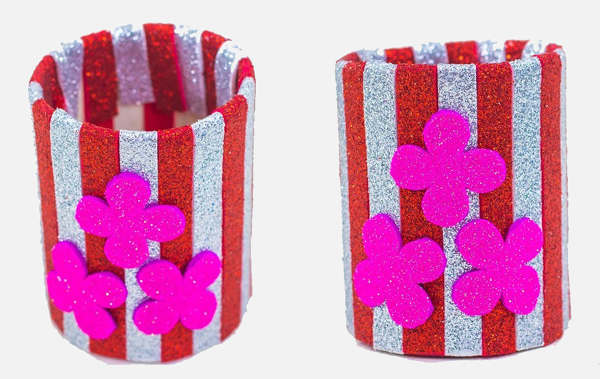
This beautiful paper craft helps create these bright-coloured pen stands using a glitter foam sheet with easy-to-do instructions.
Speciality: These cute pen stands can be made with glitter foam sheets of different colors and make ideal gifts
Material:
- Glitter foam sheet of different colors (self-adhesive)
- Scissors
- Plastic Bottle
- Glue
How to Do:
- Cut strips of glitter paper in two different colors
- Take a plastic bottle and then cut it into half
- Place the cut bottle on a foam sheet and draw the base
- Cut it out along with the same size on a piece of paper
- Peel off the sticker on the foam sheet and stick it onto the cut piece of round paper
- Apply Fevicoland place this inside the cut bottle to form the base of the stand
- Now begin peeling the sticker off the strips of paper that were cut earlier
- Paste it to the sides of the pen stand in alternating colors
- Bend the excess strip on the top and fold it inwards as shown in the picture, and stick
- Draw a flower on the pink glitter foam sheet, cut it and decorate the stand’s sides.
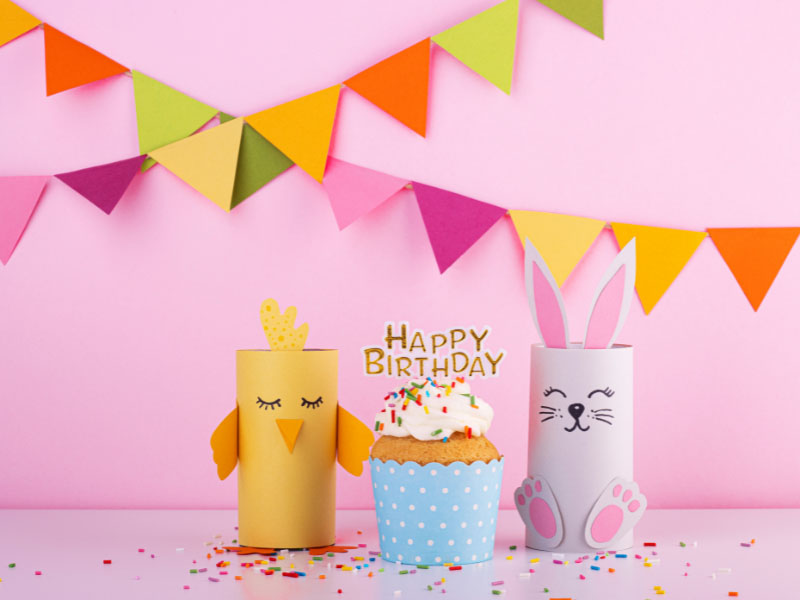
10. Birthday Paper Craft:
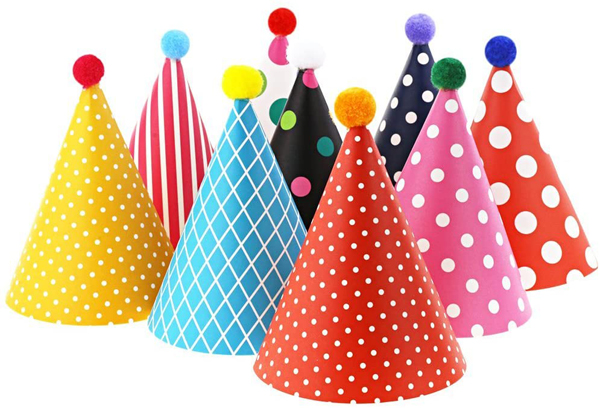
Birthday party caps can be made with these cute paper crafts and readily available materials. The instructions are so simple that you can make quite a few at short notice for everybody. Decorate the caps using glitter and sequins, and use your imagination to make them look shiny.
Speciality: Get ready to make these birthday party caps in a jiffy in different sizes and colors
Material:
- Patterned paper (different colors and designs)
- Glue
- Scissors
- Stapler
- Pompom in different colors
How to Do:
- Cut the patterned paper and make it a cone shape
- Trim the edges and staple them so that the cone shape stays in place
- Ensure that the size is such that it stays on the head
- Decorate with pompoms on the tip of the cone, as shown in the picture
- Your brightly colored-birthday party caps are ready!
Read: Crafts for Teachers Day
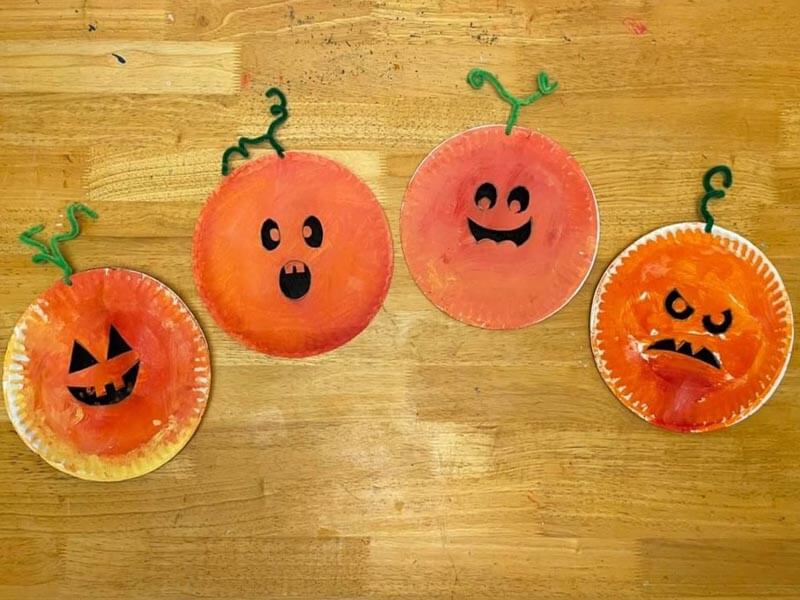
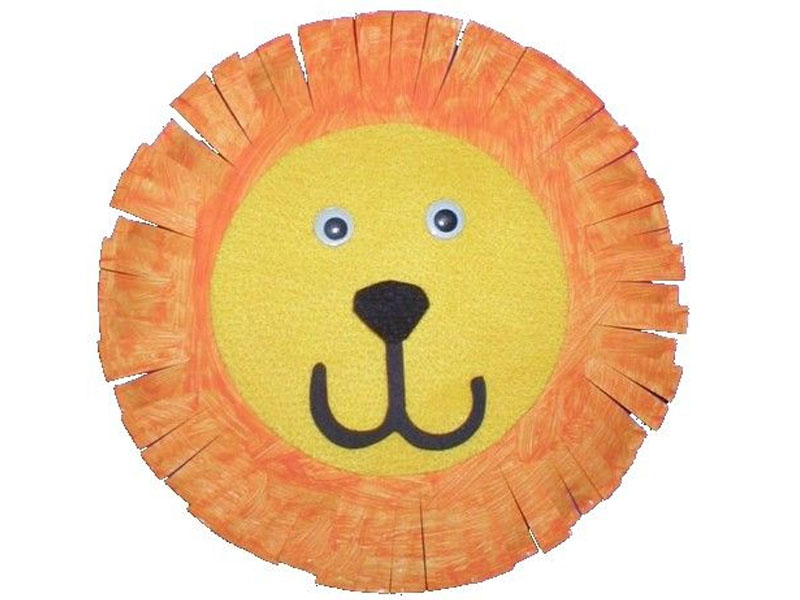
11. Paper Plate Craft:

Create beautiful turtles with this easy-to-do paper art project using paper plates. You can color or decorate the shell with pieces of color paper cut to shape.
Speciality: Children enjoy this craft as it is reasonably easy to create and makes crafting time fun for all.
Material:
- Paper plates
- Scissors
- Marker pens
- Green color paper
- Googly eyes
- Glue
How to Do:
- Take a paper plate and then turn it over
- Decorate the turtle shell either by coloring it or cutting pieces of green color paper and sticking it as shown in the picture.
- Cut out the four legs and tail with scissors
- Glue them to the bottom of the shell.
- Stick googly eyes to the head of the turtle.
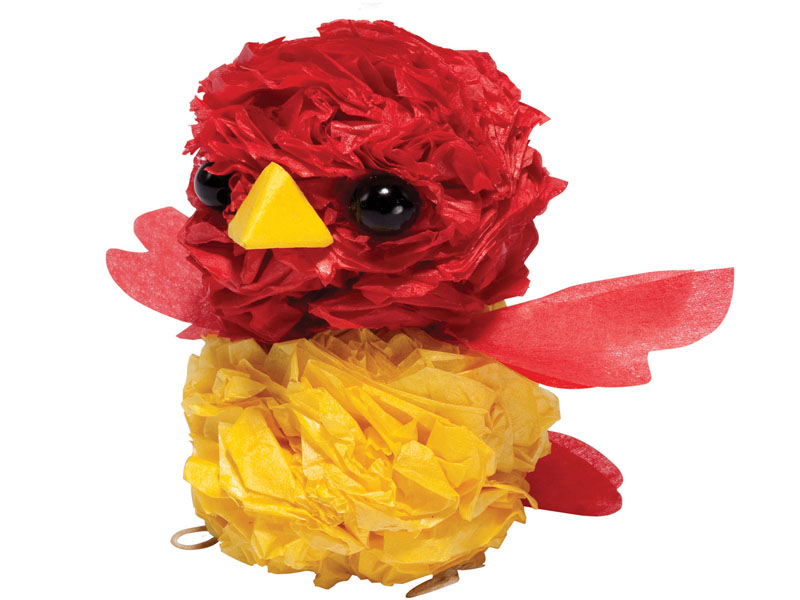
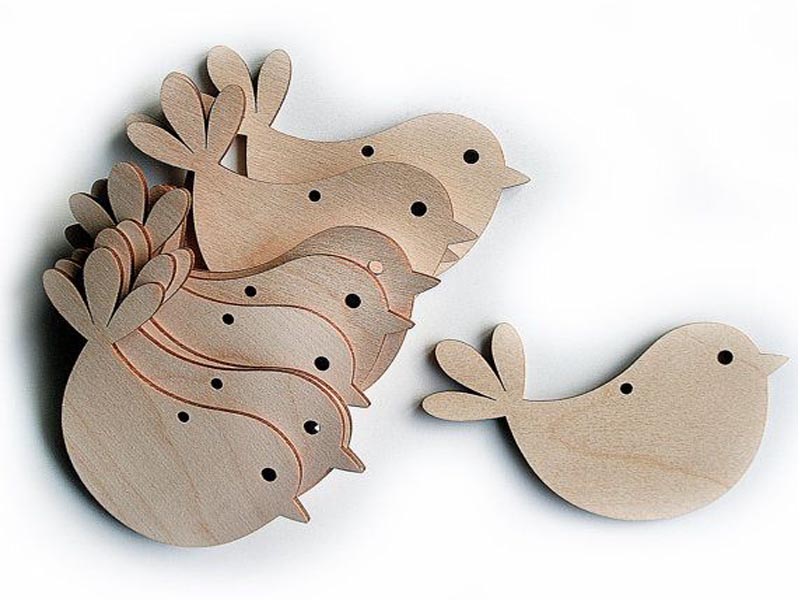
12. Paper Birds Craft:
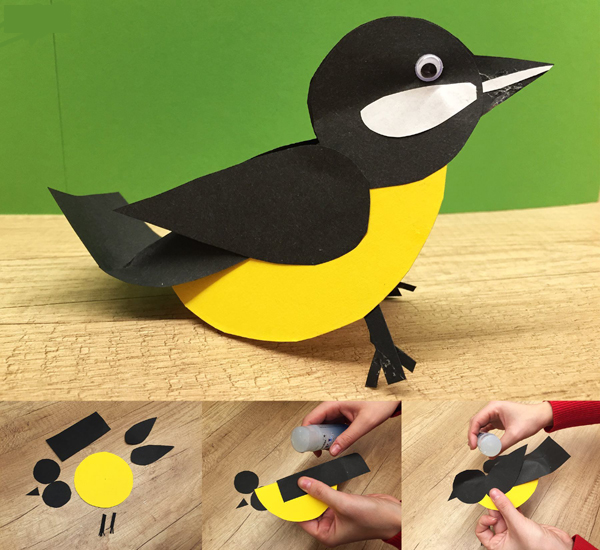
This is an easy DIY paper craft to make a bird for kids that can be used as a decoration, make good gifts, and also help them to learn more about the different kinds of birds.
Speciality: Papercraft birds are an easy and fun craft idea for children to create with easy-to-follow steps.
Material:
- Chart paper of two different colors (black and yellow)
- Scissors
- Glue stick
- Googly eyes
How to Do:
- Cut the chart paper in the shapes shown above
- Use glue to stick them as in the picture.
- Create the beak and tail accordingly, and stick the googly eyes
- This simple craft is great for keeping the children engaged.
13. Paper Lamp Craft:
Lamps are a must for most Indian festivals, and children can help make these bright and beautiful lanterns for celebrations and occasions.
Speciality: This is a pretty amazing paper craft idea that will keep children occupied during festival season and provide them options for actively helping out with the decorations.
Material:
- Colored paper
- Pencil
- Scale
- Scissors
How to Do:
- Fold a bright-colored sheet into half.
- Draw perpendicular lines, as shown in the picture, and cut them into strips of colored paper.
- Turn the base and the top band around to finish the lantern.
- Staple it to secure it in place.
- You can decorate the lantern using glitter or sequins.
14. Foam Paper Craft:
Foam sheets are great to work with, and children have a lot of fun as they have a wide range of colors and are inexpensive. Craft ideas with foam sheets are safe and make crafting and decorating easier compared to other materials.
Speciality: These foam paper craft flowers can be created by very young children and are self-adhesive, making crafting enjoyable and fun.
Material:
- Foam sheets of different colors
- Scissors
- Pencil and thick paper
How to Do:
- The first thing would be to draw out flower shapes on paper and make templates in different sizes.
- This would be helpful as it makes work easy for the kids to make many flowers.
- Place the flower template on the foam sheet and cut out the shapes
- You can decorate a side wall or even make a photo frame with these flowers, as shown above.
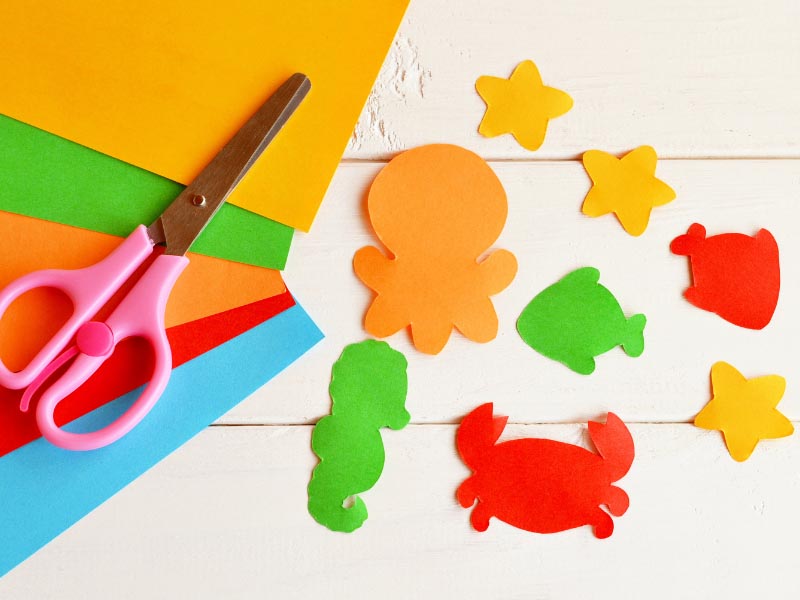
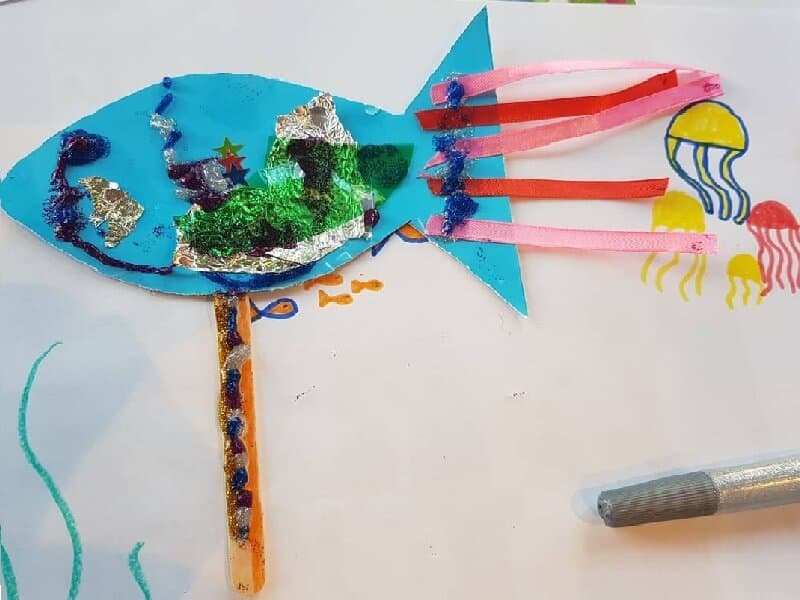
15. Paper Fish Craft:
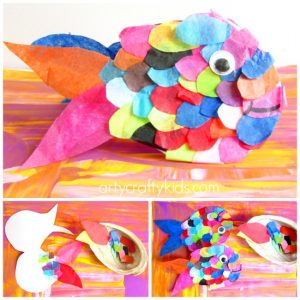
This is a colour paper craft that keeps the children engrossed in cutting and working with so many colors and has them immersed in creating the colourful fish.
Speciality: This rainbow-colored fish’s eye-catching colour is a delight to make.
Material:
- Card
- Googly Eye
- Glue Stick
- Scissors
How to Do:
- Fold a piece of paper into two
- Draw a fish and cut it according to the shape
- Layer the card with tissue paper and add Googly for the eyes
- This is one craft that will keep the children engaged.
Read: Easy Newspaper Craft Ideas For Kids
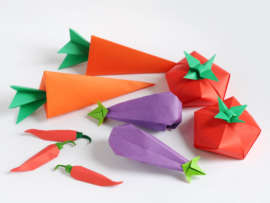
16. Paper Fruit Craft:
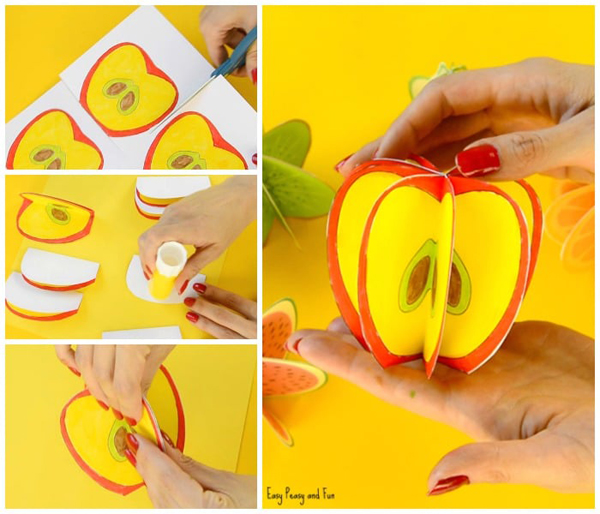
This can be made with fruits of different colors and is easy to make. They make an interesting school craft project and are useful for decoration.
Speciality: Papercraft3d can keep you occupied with your children during their holidays and help you create fruits for your fruit basket.
Material:
- Paper (we recommend heavier print paper)
- Scissors
- Glue
- Markers and paints
How to Do:
- You can either use readymade templates by printing them out or make them ourselves
- Eight layers of fruit are required to make this 3D fruit
- Cut out the shapes as shown in the picture and fold them in half
- The fold should be crisp, and glue it one on top of the other
- Apply glue on the last one to stick the last slice to the first one.
- Make a basket of fruits using the same technique.
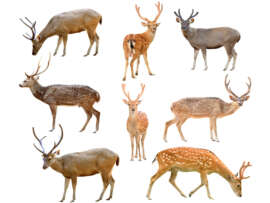
17. Raindeer Paper Craft:
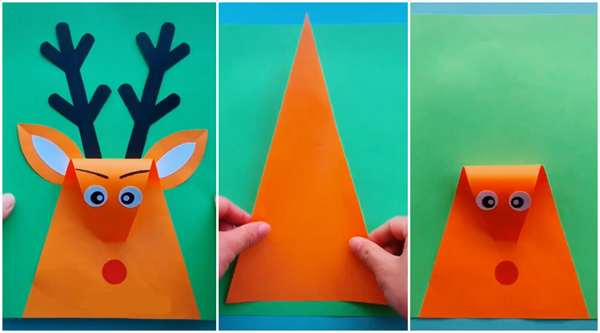
This papercraft for home decoration consists of an activity that involves cutting, folding, and sticking paper. It requires very little material to create this beautiful reindeer.
Speciality: It works to enhance the cognitive skills of children.
Material:
- Colored paper in different colors (green, orange, white, red, and black)
- Scissors
- Glue stick
- Black sharpie pen
- Pencil
How to Do:
- First, make the base in green color with an orange triangle for the reindeer’s face
- Sticking and folding the base sheet as shown in the picture
- Stick and secure the nose of the reindeer
- Avoid creases in the paper by pressing too hard
- Cut a red circle for the nose and stick it to the tip of the reindeer’s nose
- Next, add the eyes to this paper reindeer
- Make the ears by cutting out a leaf-like shape in orange and a smaller one in white and sticking it.
- Finally, make the horns by drawing the horns’ shape on black paper and cutting it out to stick them on top of the reindeer’s head.
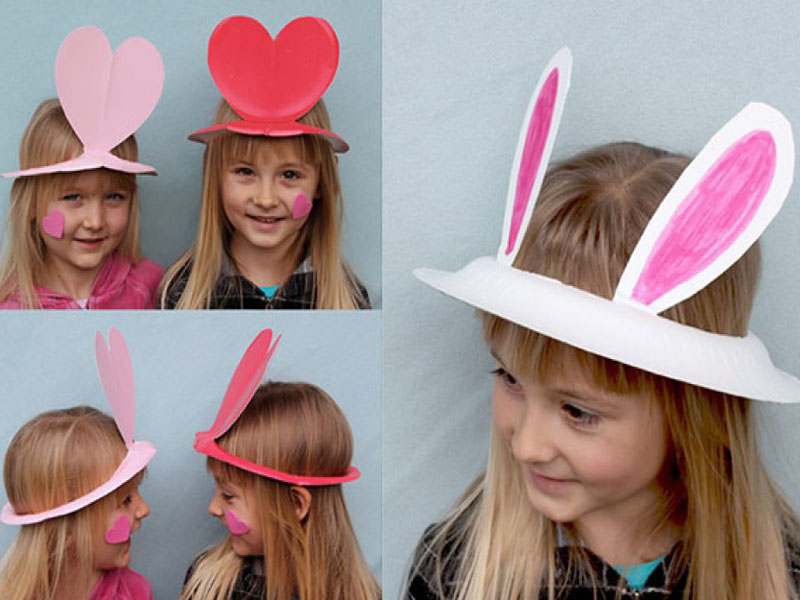
18. Paper Hat Craft:
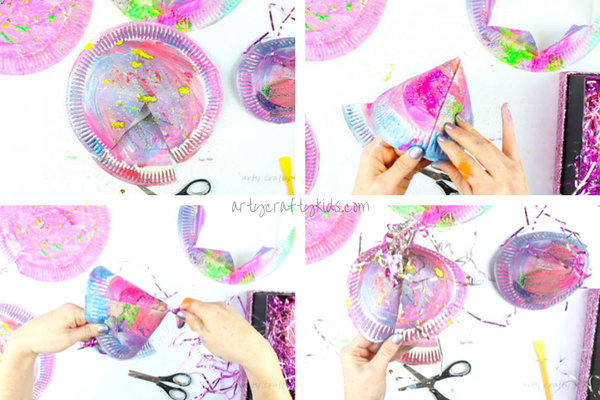
Whether it is for a birthday, New Year, or Christmas, these party hats are fun to make, and there are several ways you can use your imagination to create different styles.
Speciality: If you want to make a party hat for any occasion, all you need is a paper plate.
Material:
- Paper plate
- Tassels
- Scissors
- Stapler
How to Do:
- Cut a triangle from a paper plate
- Next, fold it to form a cone
- Before securing it add tassels to come out of the top of the cone
- Secure the plate at the bottom with a stapler.
- Your party hats are ready!
19. Paper Crown Craft:
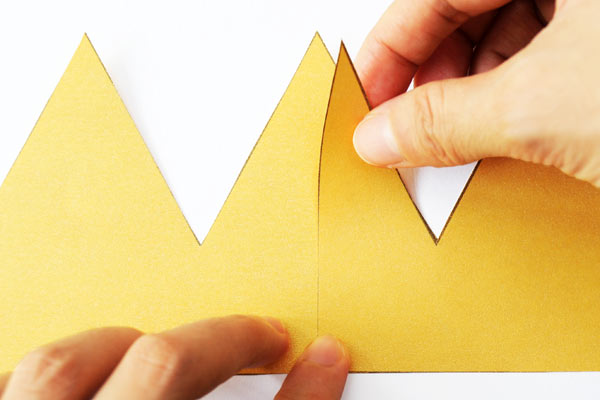
Paper crowns can be made in a jiffy once you have crown templates ready. This craft idea demonstrates how to make crowns be it for a birthday or a school function.
Speciality: Make eye-catching crows with these easy-to-follow instructions.
Material:
- A4 cardstock
- Scissors
- Glue
- Glitter glue, stones, pompoms, and ribbons for decoration.
How to Do:
- Cut the paper lengthwise like the thickness shown in the picture
- Measure the crown around the head
- With scissors, cut the jagged shape on the top part
- Attach the two ends with gum and secure them well
- Decorate the crown with various decorative materials like stones and glitter to get an inexpensive sparkly crown.
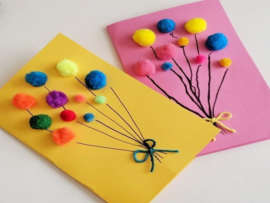
20. Tissue Paper Crafts:
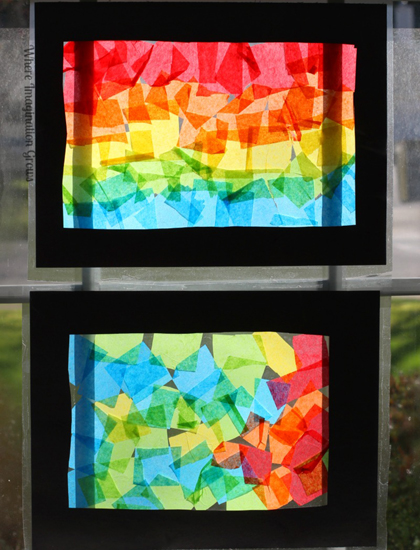
This collage is an instant favorite among children and toddlers as the pieces can be arranged in any order they like, and they have the liberty to choose colors as they wish for the collage.
Speciality: These collages in rainbow colours are simple and fun to do as there is a wide range of colours involved in it.
Material:
- Tissue Paper
- Contact Paper
- Construction paper
- Scissors
How to Do:
- First, make a frame by cutting out the middle portion of the construction paper and sticking this onto contact paper.
- The size should be such that it can be stuck to a window
- Cut tissue paper of different color into squares.
- Stick this to the prepared frame, and once stuck to the windows, it brightens up the entire room!
21. Diwali Paper Craft:
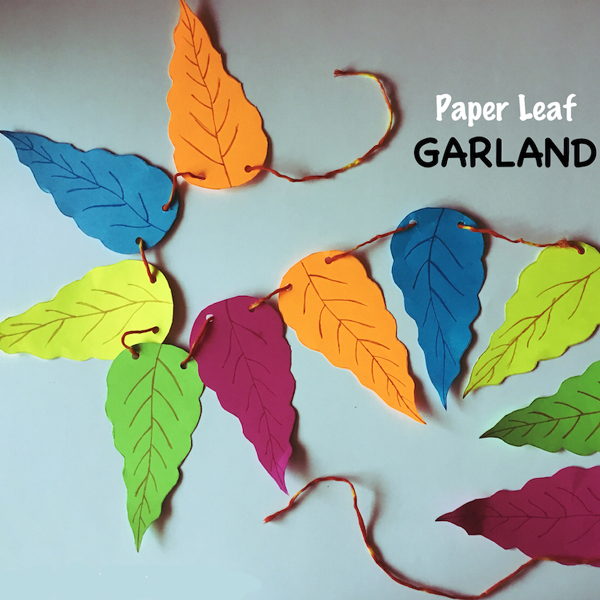
Festivals always need colorful garlands for decoration, and this paper garland is fairly easy to make. The kids have a great time, and this crafting can keep children engrossed, and there is enough color choice here.
Speciality: Young children are full of energy, and this craft is an amazing way to teach them about the festival as well as keep their hands occupied getting the garland ready.
Material:
- Cardstock paper
- Glitter pen
- Scissor
- Thread
- Single-hole punch
How to Do:
- First, prepare a template by drawing the outline of the leaf and cutting it out
- This makes it easy for children to use this template on several pieces of color paper and cut out several leaves
- Punch two holes in the leaves, as shown in the picture
- Use a pen to draw the veins on the leaves
- Thread all the leaves together, and your garland is ready!
22. Paper Basket Craft:
This paper craft of making baskets is not only easy to make but can be decorated by sticking bright paper flowers and beads according to the occasion.
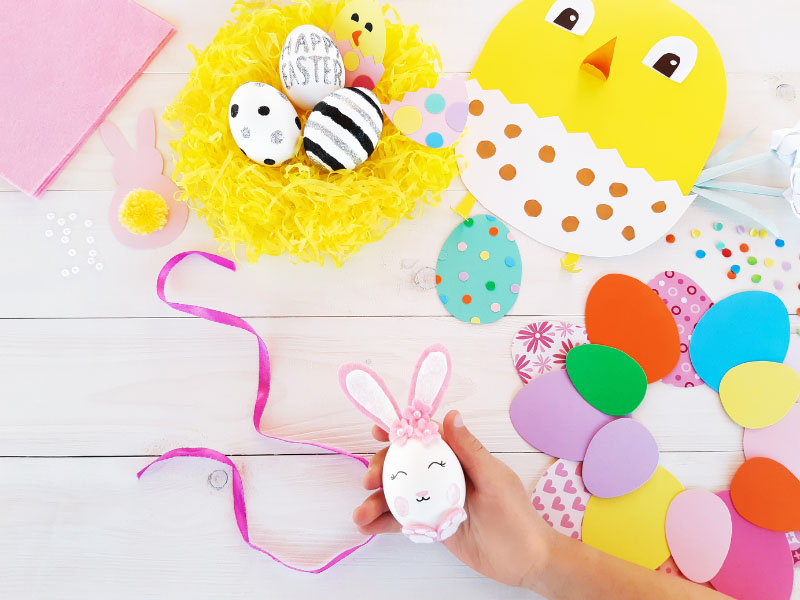
Speciality: You will enjoy making this beautiful basket to hold flowers or Easter eggs
Material:
- 12″ cardstock of 2 different colors
- Scissors
- Scale
- Pencil
- Stapler
How to Do:
- Place the scale from one corner of the paper diagonally to the opposite corner
- Draw a straight line from the corner
- Do this for all four corners.
- Cut and do as shown in the picture
- Pull the corners to one side and secure them in place with a stapler
- Do this with all the corners until you can form a basket shape
- Cut a strip of paper and staple it to the opposite side of the basket and staple it.
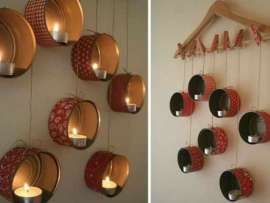
23. Paper Cup Craft:
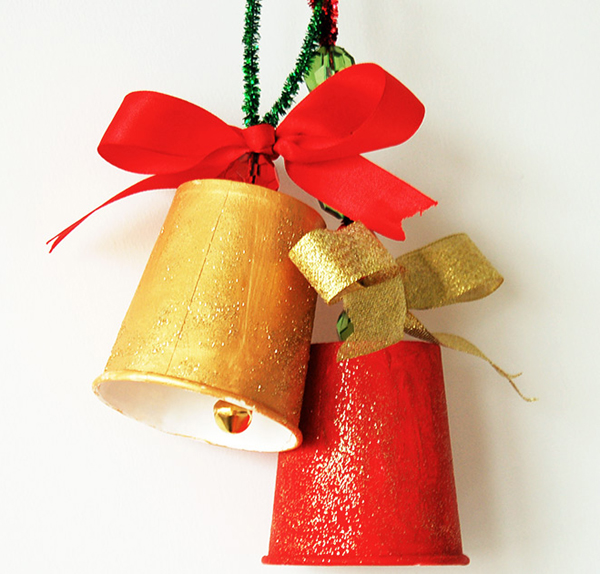
You can make amazing bells in different colors with these paper crafts for home decoration.
Speciality: Christmas bells are very popular during the Christmas season, not only to decorate the tree but also to hang them and decorate your home’s walls.
Material:
- Paper cup
- Pipe cleaner
- Big bead
- Jingle bell
- Satin ribbon
- Poster paint or acrylic paint
- Paintbrush
- Glitter
- Scissors
How to Do:
- Make a hole in the paper cup’s bottom
- Paint the outside of the paper cup with a bright-colored poster or Acrylic paint and sprinkle some glitter on it when the paint is still wet.
- Attach a string to a pipe cleaner and make a loop at one end where the length should approximately be the same as the height of the paper cup
- Next, tie a string to the loop and connect a jingle bell.
- Insert this through the hole at the bottom of the paper cup and string a large bead until it reaches the paper cup’s bottom
- Ensure that you tie the end above the bead.
- Make a bow with a satin ribbon and tie it as shown in the picture.
- Adjust the length of the string and hang the bell as a Christmas tree ornament.
24. Paper Umbrella Craft:
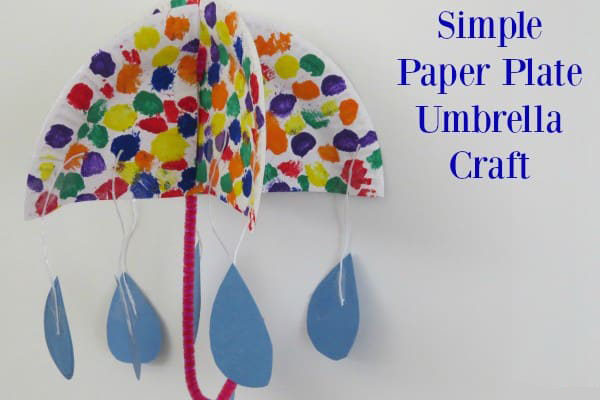
Umbrellas can be made in different colors, such as they can be multi-colored or plain solid colours. Decorations can be stuck on the umbrella to make it look attractive.
Speciality: This craft helps in the eye-hand coordination of children and allows them to use their imagination. It also helps in fine motor development.
Material:
- Paper plate (big)
- Scissors
- Paint in different colors
- Stapler
- Pipe cleaners
- String
- Blue card
How to Do:
- Paint the paper plate with different color dot
- Cut the plate in half after the paint dries
- Cut 1 cm off one half of the plate, not the whole way through
- Slide one half of the plate into the other, creating an x mark shape
- Secure them with a staple pin so that they don’t come apart
- Take the pipe cleaner and bend it to form a J shape to resemble an umbrella handle
- Use tape to stick it to the center of the paper plate
- Attach a string to the top of the umbrella with tape
- Cut the blue card in the shape of raindrops and hang it evenly all around the paper plate umbrella.
Read: Stunning Tissue Paper Crafts
25. Airplane Paper Craft:
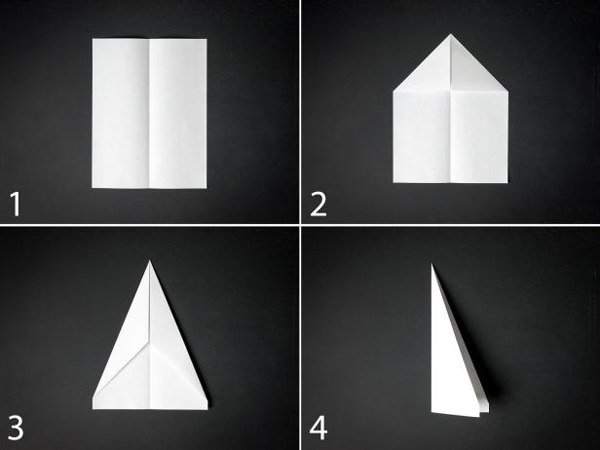
This is the most basic type of what we have all made as kids. It does not need much to make this plane other than a piece of paper and some tape.
Speciality: This basic plane is also known as the dart and is quite easy to make.
Material:
- Paper
- Scissors
How to Do:
- As shown in the image, fold the paper vertically into half
- Now unfold and fold the top corners into the midline.
- Fold the top edges into the middle line.
- As in the picture, fold the wings down along the top edges up with the body’s bottom edge
- Now, stick tape to the inside so that the finished plane looks like the image above.
You can reap the benefits of an amazing hobby such as paper folding craft as it works best at keeping your attention focused. Paper crafting offers immense benefits for both children and you as it keeps mild cognitive impairments at bay and also keeps them engaged during holidays. It strengthens family bonding time where there is equal participation between the young and the old to create something beautiful. Please let us know which crafts in this extensive article helped you the most in your comments below.
FAQs:
1. Is the paper crafting kit available only for children?
There are paper crafting kits available containing all the materials required, such as tools and step-by-step instructions to create something beautiful and offer you an opportunity to express yourself. It is also an outlet for your creativity. You can gift your family and friends as they carry more value because it has a personal touch to it.
2. What are the rules for safe crafting?
Firstly, thoroughly read the instructions and ensure that you have all you need before you begin your project. There should be a comfortable amount of space to work on your crafting project. Keep an eye on young children and see that the paints you use are non-toxic. Plan in a way that you have adequate time to work on your project and do not have to rush through it. Avoid working when you are tired, and take care to see that you do not have any distractions.
3. What is printable papercraft?
Printable papercraft is available for both adults and children. They can be easily downloaded from online sites and are in the form of templates that makes paper crafting easy and saves time during your activities.
Disclaimer: The ideas on crafting explained in the article are for children’s and adults’ educational purposes. The main criteria are to create general awareness and suggest crafting options that can be done safely at home to improve eye-hand coordination and fine motor development.
Image Source: 1, 2, 3, 4, 5, 6, 7, 8, 9, 10, 11, 12, 13, 14, 15, 16, 17, 18, 19, 20, 21, 22, 23, 24, 25.


